Courses/Computer Science/CPSC 203/CPSC 203 Template/CPSC203 Template People/Navneet Bhalla
Contents
I am a TA for CPSC203, tutorial section T25.
Contact Information
My email address is: nbhalla@ucalgary.ca
Tutorial and CT Hours
My tutorial hours are:
- Monday 9:00 - 10:00 am; MS236
- Wednesday 9:00 - 10:00 am; MS236
My CT Hours are:
- Monday 5:00 - 6:00 pm; MS236
Announcements
- I may be away on Wednesday October 15th. As a consequence, the tutorial on Wednesday October 15th may be cancelled. Further information will be sent by email, and a note will be posted here.
- I will be away Wednesday, October 15th. Mina Askari has been kind enough to volunteer to teach this lab. Therefore, tutorial is still on (not cancelled).
Groups (term project and TBA4)
The groups have been modified. Last updated on 07/10/2008.
- Group 1:
- Anthony Abreu
- Gabriel Cortes
- Logan Gorsalitz
- Sarah McCabe
- Brandon Schur
- Group 2:
- Jodi Bengtson
- Andrew Dang
- Taylor Nill
- Ioanna Tomaras
- Group 3:
- Marae Daroux
- Manisha Kooner
- Annika Odegard
- Khai Tran
- Group 4:
- Ravneet Chima
- Dale Frankoski
- Jennifer Lindsay
- Mirena Savage
- Group 5: Social Implications of Text Messaging,Instant Messaging, and Email
- Reagan Chornoboy
- Ryan Gillen
- Elana Lovell
- Jonathan Savoie
Database Example - creating a new field
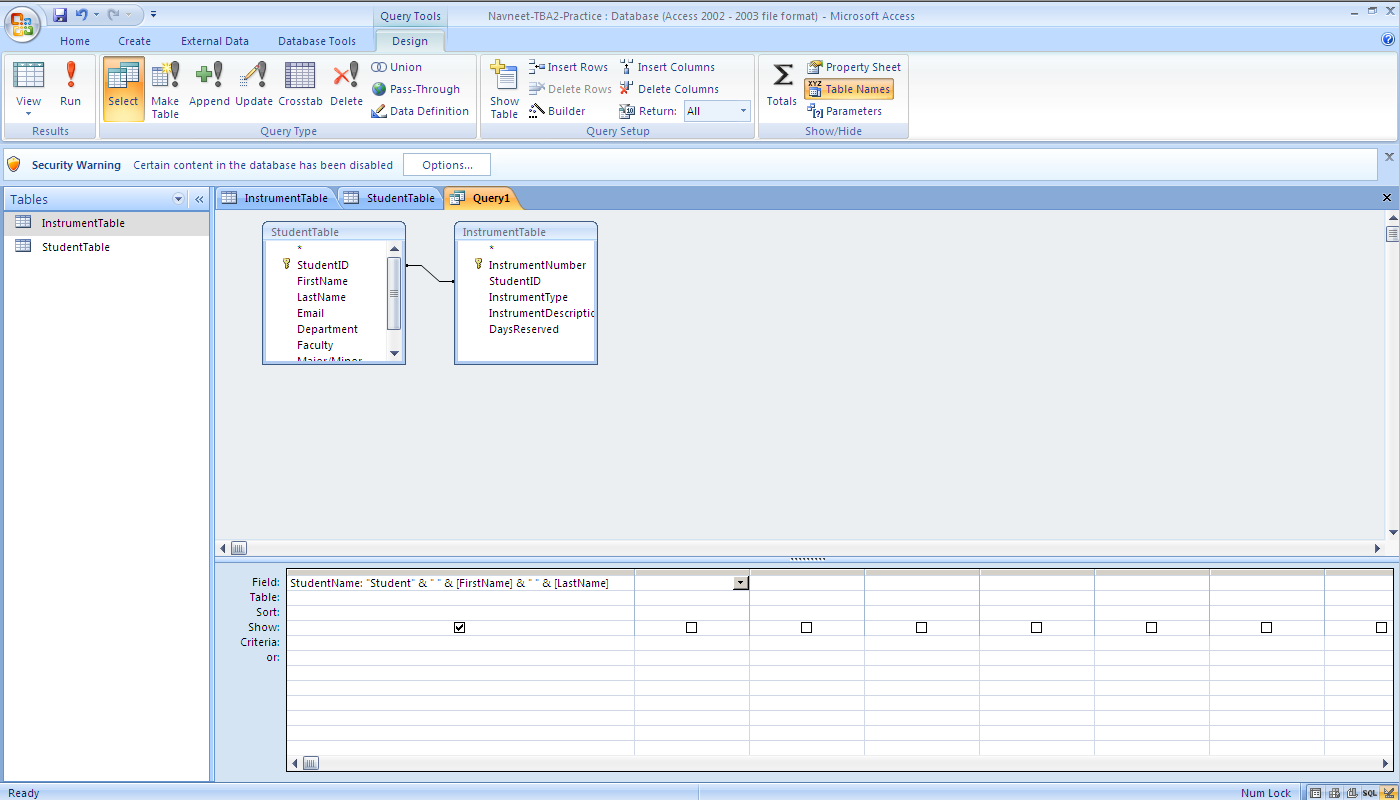
In Access, you can create new fields when performing queries, by using expressions. Instead of selecting a field from the drop-down menu, you can type an expression in the space provided. An expression has the following syntax (expression name, followed by a colon, and finally followed by the expression itself):
- ExpressionName: ExpressionStatement
- ExpressionName will be the name of the new field
- Don't forget the colon!
- Expression statement can be used to combine different elements, such as fields and a string of text. To combine these elements, use either the + operator or the & operator. The name of a field must be within square brackets, e.g. [field]. A string of text must be within double quotations, e.g. "SomeText".
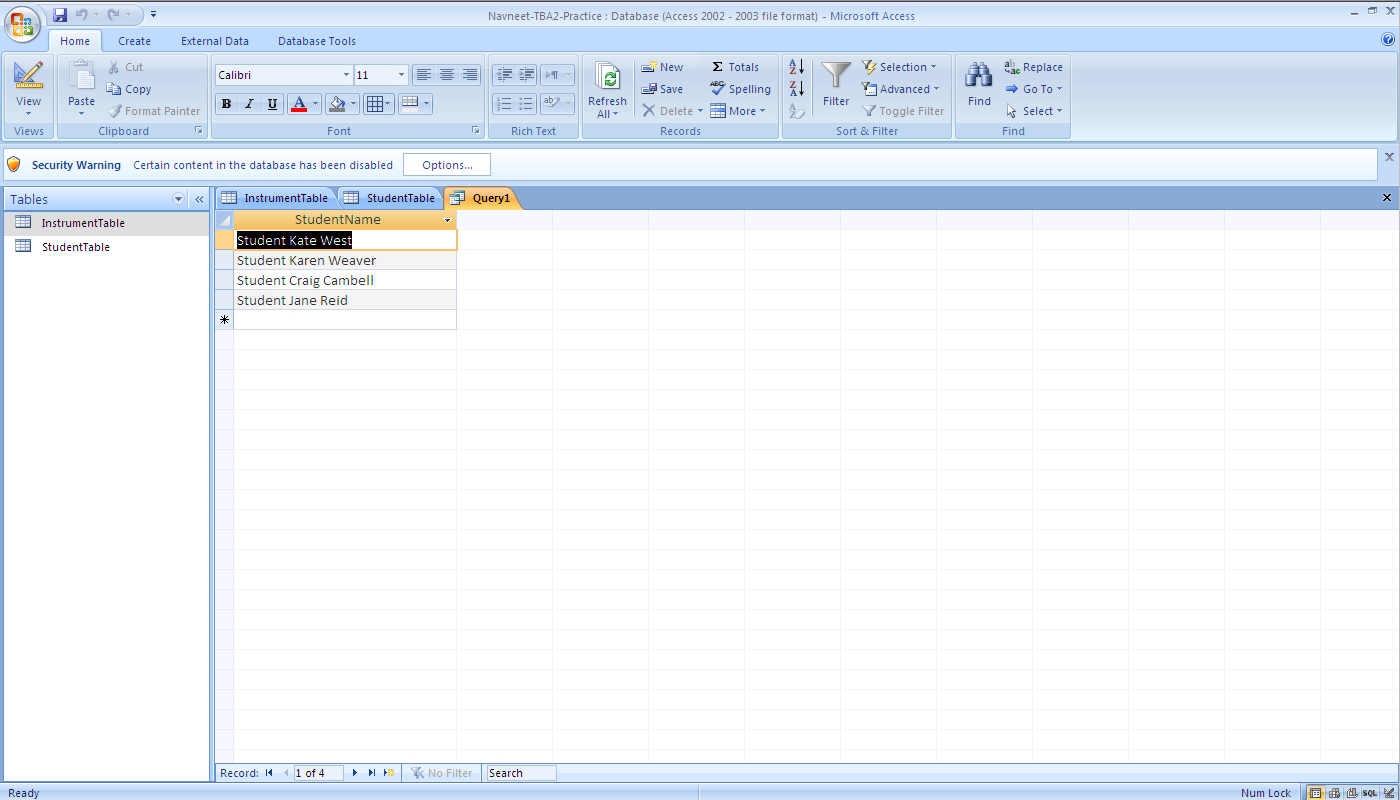
EXAMPLE: Write an expression to combine the first names and last names of students, prefixed by the text 'Students', and with a space between each of these three elements. You can download a sample database with two tables, to implement this expression (http://wiki.ucalgary.ca/page/Courses/Computer_Science/CPSC_203/CPSC_203_Template/Labs_Template/TA_Examples_for_Access#Navneet:_Practice_TBA2). The two screenshots below show how to implement this expression, as well as the result of the query.
Problem Solving Material
There is a difference with some picture functions in the original version of JES (version 1) and the latest version available for download (version 3). The difference is some functions is that some functions take a color parameter, and some don't (the ones that don't use a default colour of black). Below you'll find three picture functions that you should be familiar with:
- addLine
- addRectFilled
- addText
JES version 1 is installed on the lab computers, so you must know the syntax of these functions for version 1 to write TBA3. The other built-in function in JES we covered in tutorials are the same for both version 1 and version 3:
- pickAFile
- makePicture
- show
- makeColor
JES version 3 (available for download to use on your personal computer)
The following is documentation from the JES help information, provided in version 3.
JES version 1 (installed on the lab computers)
The following is documentation from the JES help information, provided in version 1.
JES version 1 vs. version 3 example (and using the dot operator or passing picture data)
In addition to the variations in picture functions definitions in JES version 1 vs. JES version 3, there are two ways to call picture functions. The way that I demonstrated how to call these picture functions (picture manipulation; to draw items on a picture) was to pass the picture data to the function (as the documentation above demonstrates). The other way (which is shown in the lab material for the Problem Solving module) is to use the dot operator. I didn't cover the dot operator as it is more complicated to understand how it works, and is not necessary for the purposes of this class. Regardless, I have posted a JES example which shows the difference in using the above three picture function, JES version 1 vs. JES version 3, and passing picture data vs. using the dot operator.
Important note: for the students in my section (T25), if a question on TBA3 says to use one of the above functions, use the method of calling the function you feel most comfortable with (passing picture data vs. using the dot operator); both are acceptable.
You can either copy the code below, and use it in JES version 3, or download the files Navneet-JESBonusMaterial from Blackboard (under Course Documents). If you want to use the this code in JES version 1, then comment-out the JES version 3 functions and remove the comment for JES version 1.
 #parameter: none
 #return: none
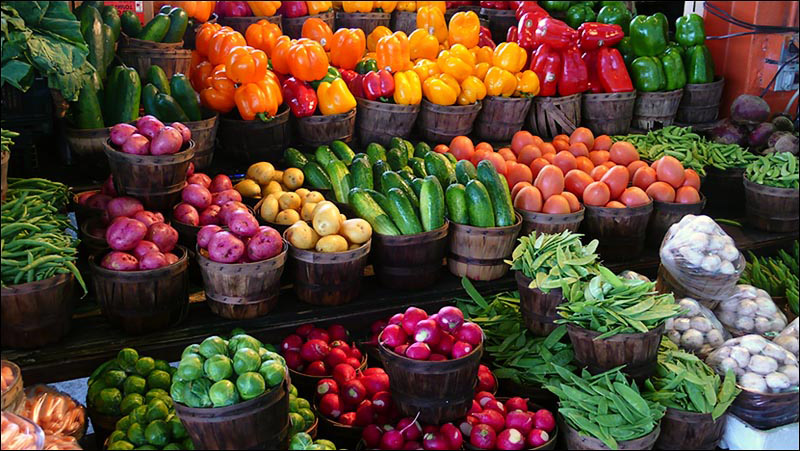
 #description: this function shows examples of the different styles of picture functions. Use the 800 by 451 (width by height) picture (farmersmarket.jpg) to run this example.
 def pictureFunctionsExample():
   fileName = pickAFile()
   myPicture = makePicture(fileName)


   #There are two versions of the addRectFilled function. The first version is used by passing picture data, and the second is by using the dot operator.
   #This example shows how to draw a rectangle near the top-left and near the bottom-left corners of the picture.
   addRectFilled(myPicture, 30, 30, 50, 100, red) #the syntax of this function is the same for JES version 3 and JES version 1
   myPicture.addRectFilled(blue, 30, 375, 100, 50)


   #There are two versions of the addLine function. The first version is used by passing picture data, and the second is by using the dot operator.
   #In the first version, there is a difference between JES version 3 and JES version 1
   #This example draws shows how to draw vertical lines.
   addLine(myPicture, 250, 0, 250, 451, green) #JES version 3
   #addLine(myPicture, 255, 0, 255, 451) #JES version 1
   myPicture.addLine(white, 260, 0, 260, 451)

   #There are two versions of the addText function. The first version is used by passing picture data, and the second is by using the dot operator.
   #In the first version, there is a difference between JES version 3 and JES version 1
   #This examples shows how to draw test near the centre of the picture.
   addText(myPicture, 400, 150, "Some example test", orange) #JES version 3
   #addText(myPicture, 400, 250, "Some example test") #JES version 1
   myPicture.addText(gray, 400, 350, "Some more example test")

   show(myPicture)
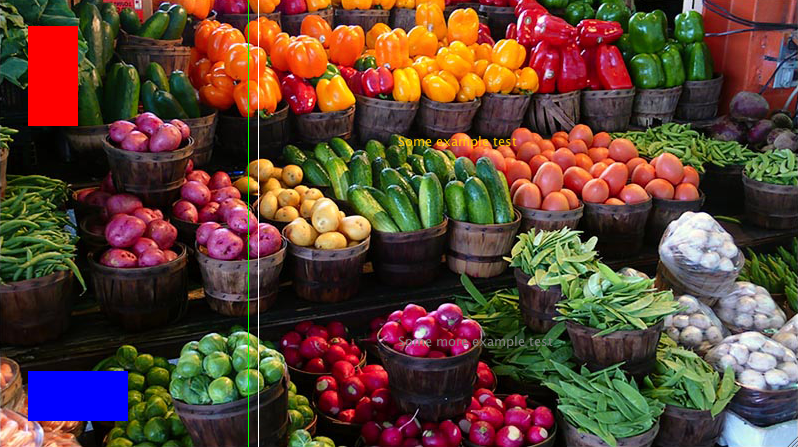
If you run the example code, using Farmersmarket.jpg image as input, then you'll get the following result.


