Courses/Computer Science/CPSC 203/CPSC 203 Template/Labs Template/Week 1 - Lab 2: Fields, Keys, Simple Queries (single table)Intro to Assignment 1
Contents
Notes
- Skills covered in this module:
- Create a new database
- Create tables
- Create records
- Create forms
- Create queries
- Create reports
- A step by step simple example of how to create databases, tables, records, forms, queries and reports.
- Currently, sample screenshots are provided. Once a copy of Office 2007 is obtained, sample databases will be made, along with their corresponding screenshots.
Fields, Keys and Simple Queries
Today's tutorial introduces the basic parts of a database, using MS Access. At some point in our lives we all have (contact lists, records, finances, etc.) A spreadsheet is a good starting point, but often when there's a lot of information a database is more efficient.
In this module the student will learn: What a database is, how information is structured and stored. Summary After completing this module, a student should be able to demonstrate the following skills:
- have an understanding of how information is structured and stored in a database
- will be able in the next lab to create a new database, setup tables and fields
Background Material Resources
- Computer Science Illuminated, Third Edition by Nell Dale and John Lewis
- ISBN-13:978-0-7637-4149-5
- http://www.jbpub.com
- Lab 8 page 177 of Fluency Computer Skills Workbook
- Lab 9 of Fluency Computer Skills Workbook
Create a New Database
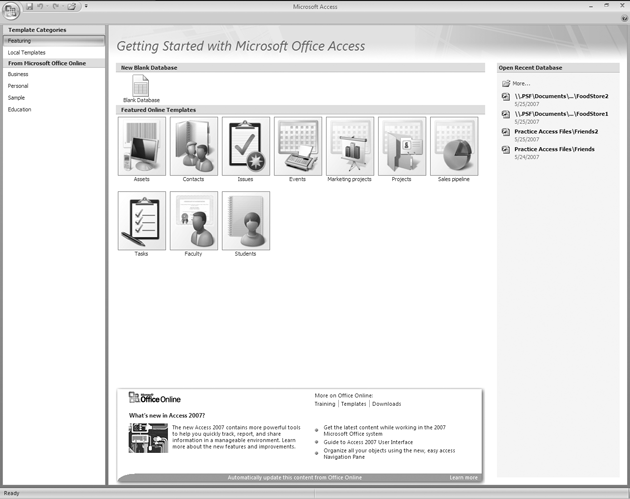
Open microsoft access, it should look like this:

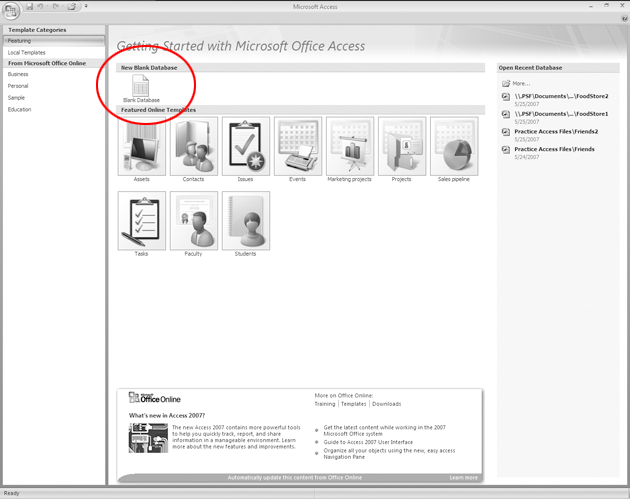
Click on Blank Database

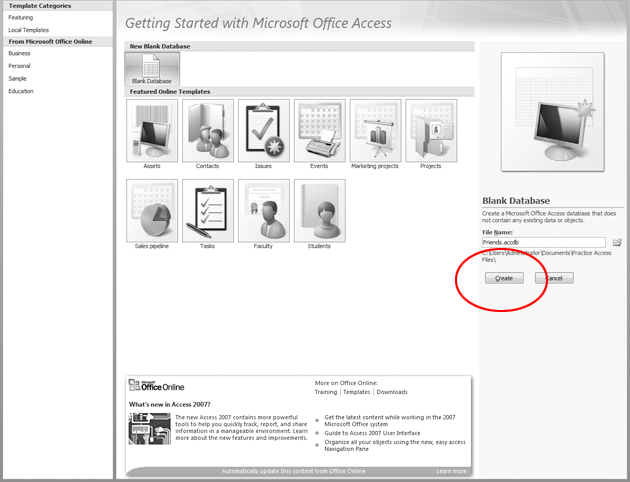
Give your database a name by typing it in the file name textfield and then click the "Create" button.

Your new database should be created and should look similar to the image below.


Create tables
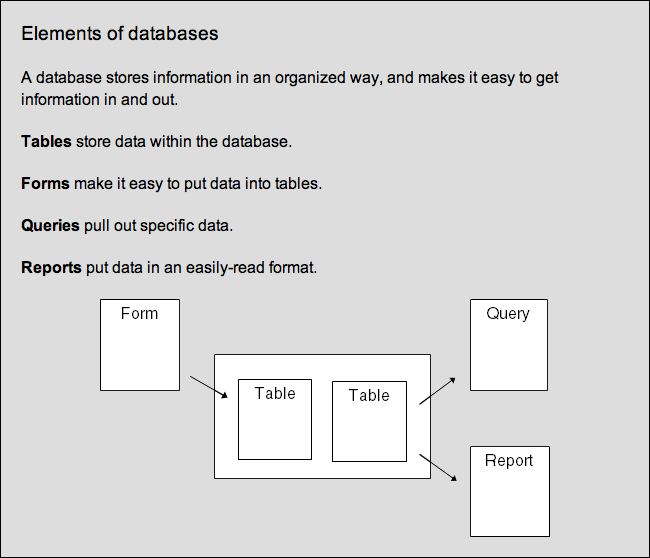
The notion of tables are central to databases. In creating systems out of databses, often we have forms to ease the feeding of information to tables. Queries that retrieve information from tables and reports that present the information from tables and queries on tables in a user friendly format.
Here is a basic overview of database elements

To create a table follow these directions, first click on the "Create" tab.
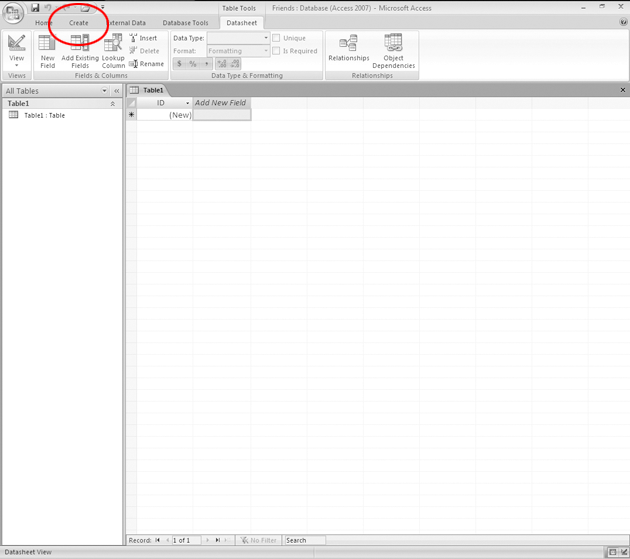

Move the mouse and let it rest on top of the "Tables" bar.


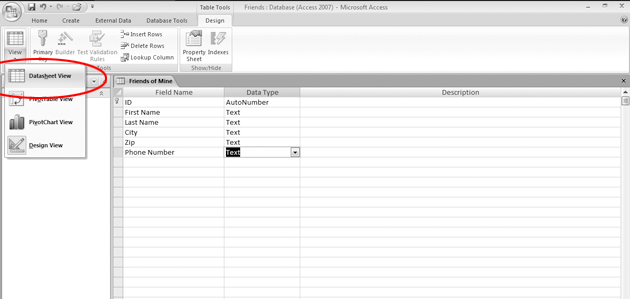
Click on the "Datasheet" tab


then click on the ribbon to select the "View" mode.


When the drop down menu appears select the "Design View"


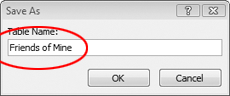
A dialog window should appear asking you to save, type in the name of the table to be created here.

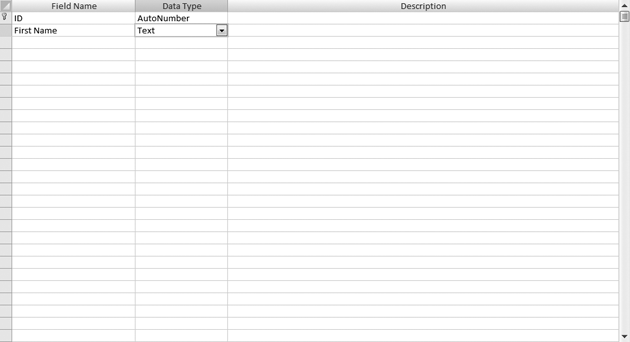
Now we need to define our fields that make up our table. Click in the second box beneath the Field Name column.
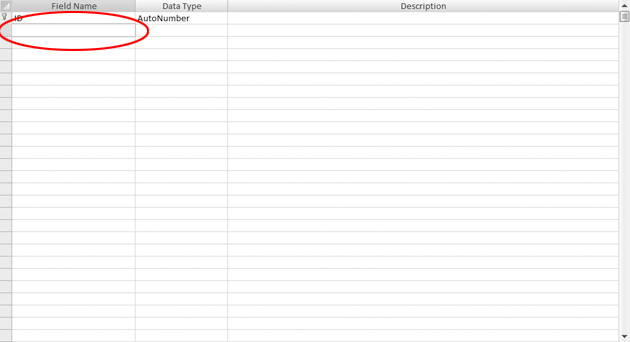

Now we need to type in a field name, e.g. First Name. Type in "First Name" as a field for this table and make sure that the data type is set to "Text".

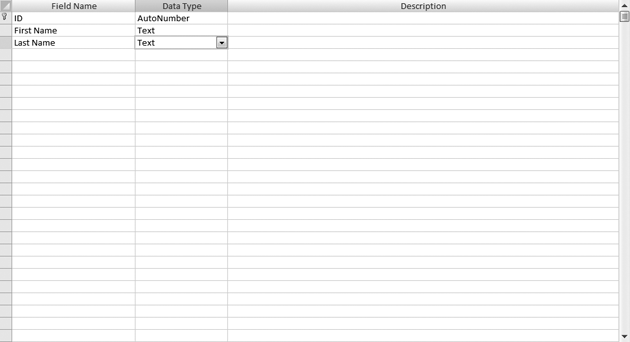
Click in the box underneath "FIrst Name" and type in "Last Name" as another field for this table, again make sure that the data type is set to "Text".
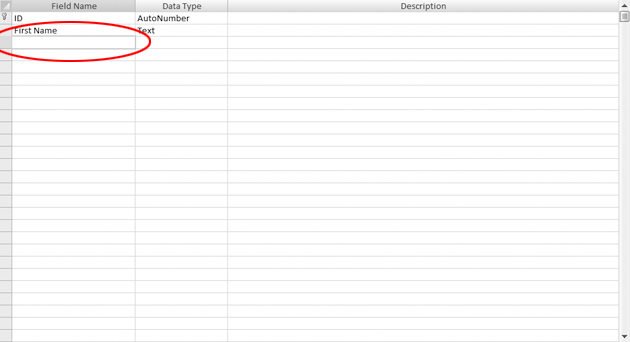

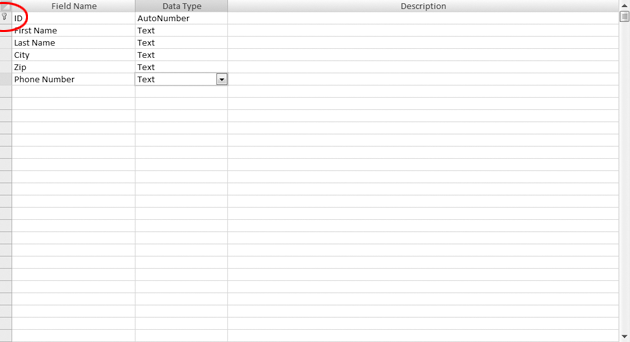
Your table should look similar to the image below. You may add additional fields to your table as needed.

Take a look at the icon beside the ID field, this icon which resembles a key indicates that for this table the field "ID" is the table's "key" field. A table's key field can't contain any duplicates. Every table should have a key field. For example, if a hospital keeps a database, each patient can have a unique ID number in the key field. That way, if it has more than one patient named John Baker, it can easily distinguish John Baker, ID #326 in for a checkup, from John Baker, ID #298 who needs his gall bladder removed.

Now we are ready to start creating records.
Create records
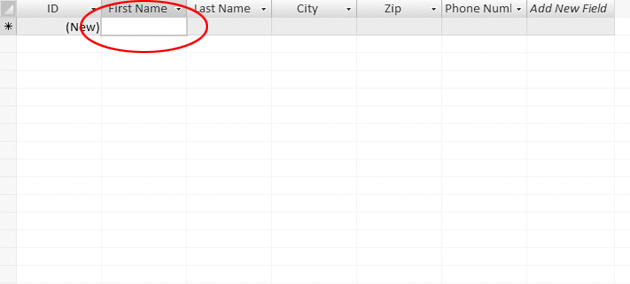
Records store all the individual informations organized in a table for a database. In the Ribbon, click "View", then select "Datasheet View".

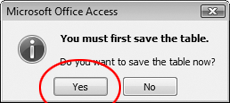
An alert window will appear asking you to save the table we created in the last section. If so, click YES.

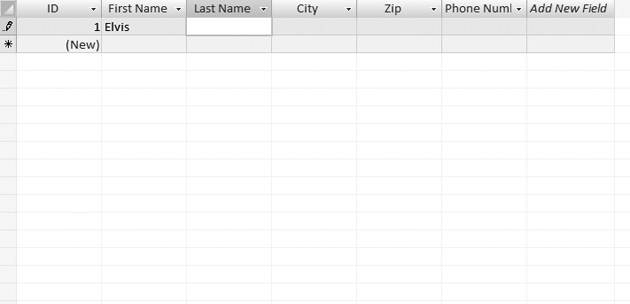
Click in the box under the "First Name" column header. Type in a name like "Elvis", press the TAB key on your keyboard and continue with filling the fields with the appropriate data

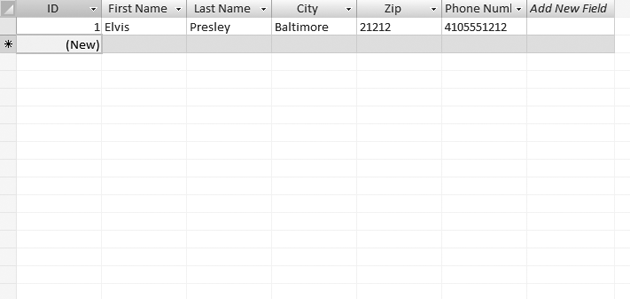
our record should look similar to the one below. Fill in the remaining fields just like the previous steps.

When you are finished you should have a similar table to the one depicted below. Notice how the cursor in the row selector has moved down to the second row. When you move on to a new row you are create a new record and Access automatically saves the previous record.

Create forms
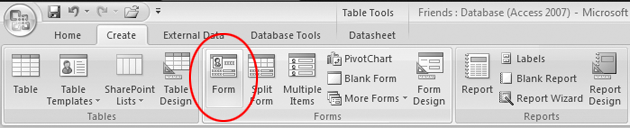
Forms are the interface to tables that allow you to create, retrieve, modify and delete information. First click on the create tab in the menubar.


Then in the ribbon click on the form button.

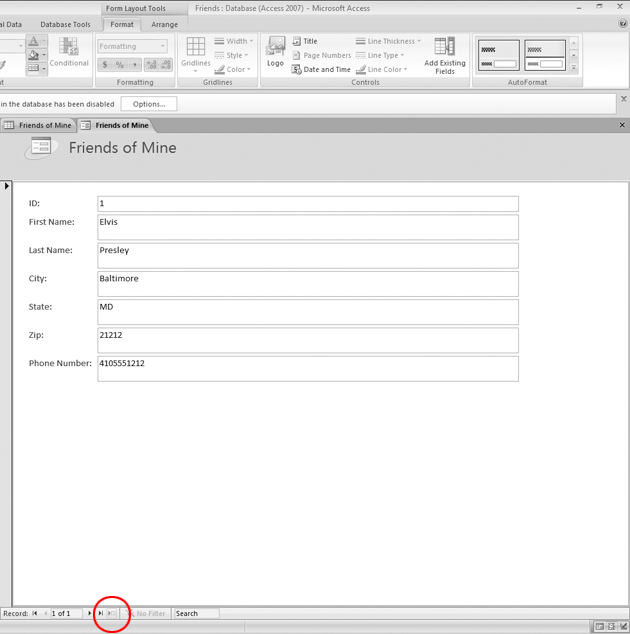
Access should automatically create for you a new form based on the table created in the previous steps, it should look similar to the one below.


To create a new record in the form click on the new record button located near the bottom of the window, and a new blank record should appear allowing you to input data.

Create queries
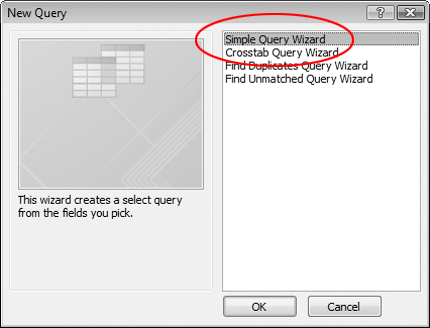
Queries are a way to retrieve specific information from a database. You can think of queries as asking the database questions about the data, for example "How many of my customers live in Alberta?" or "Which products sold well this month and what was their quantity and price?" To create a query on an existing table, click on the Create tab at the top and then in the ribbon click on the Query Wizard button.


A new query window will appear, select the Simple Query Wizard to start creating basic queries and then click on the OK button

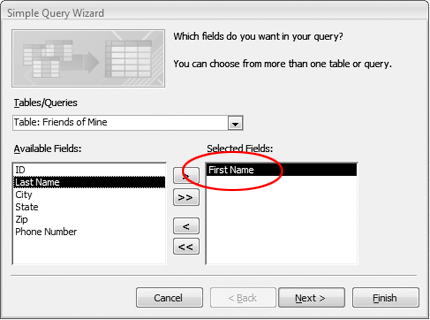
When the Simple Query Wizard appears, select the fields you want to include as part of your query from the Available Fields list and then click on the ">" button to add these fields to the list of Selected Fields.
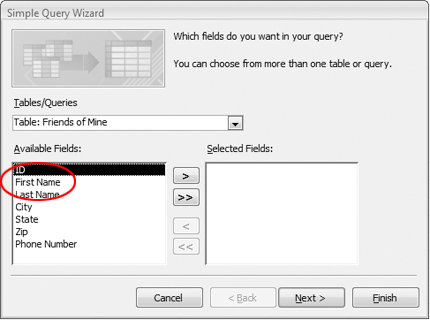

Your window should look similar to the picture depicted below, you should see the field you selected as part of the Selected Fields list. Once you have added all the fields you need click the Next button to continue with the Simple Query Wizard.

A final screen should appear (similar to the one below), give your query a name that is memorable and describes what it is that the query is doing. For example, "all customers from Alberta" and then click the Finish button.


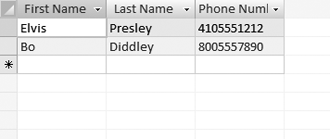
The query will be automatically saved and executed, it searches through the table and displays a final result similar to the picture below.

Create Reports
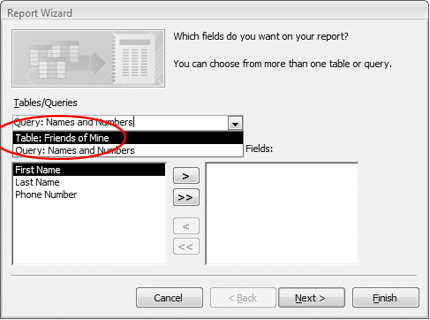
Reports are a way to present information collected or queried in a professional manner that is easy to read and understand. To create a new report click on the Create tab at the top and then in the ribbon click on the Report Wizard button.


The Report Wizard window should appear, click on the Tables/Queries drop-down arrow button. A list of tables and queries previously created should appear, select the Table: Address Book.

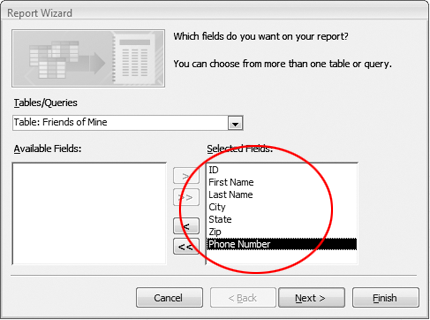
You can choose from the list of Available Fields which fields to include as part of your report. In this particular example we are going to use all the fields, so simply click on the ">>" button to move all the fields into the Selected Fields list.

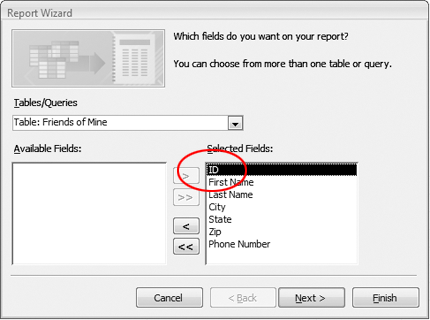
To remove a field that you may have accidently added to the list of Selected Fields, select the field such as "ID" and then click on the "<" button to move the "ID" field back to the list of Available Fields. When you are finished, click on the Next button to continue.

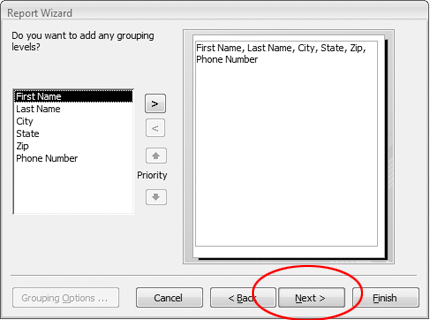
The next screen allows you to group the information, this maybe useful to avoid displaying duplicated information. For example, we could group by City all our customers from Alberta. This would group all our customers from Calgary in one section, Edmonton in another section, etc. Once you are done click on the next button to continue.

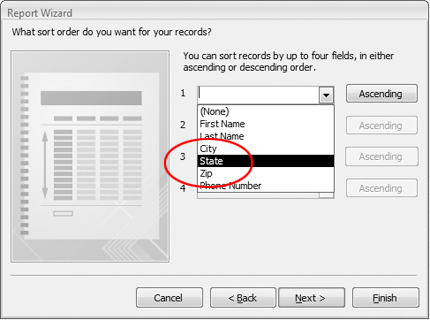
When the next screen appears, you can select how you would like to have the data arranged. For example, you can sort all the data by first or last name. Once you are done click on the next button to continue.

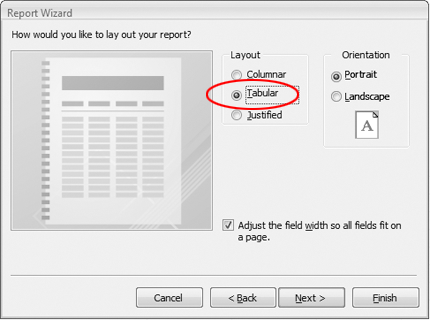
When the next screen appears, you can select the layout and style of how you would like your report to look like. Click through the various layouts to see a simple preview of how the report will be formatted. Once you are done click on the next button to continue.

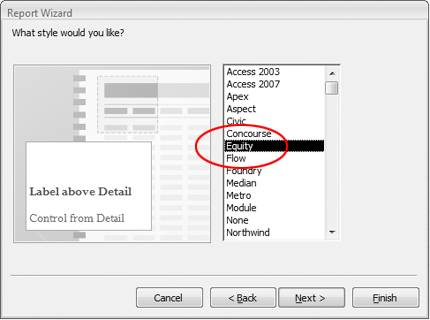
When the next screen appears, you can select the appearance of the report and see a preview what the report will look like. Once you are done click on the next button to continue.

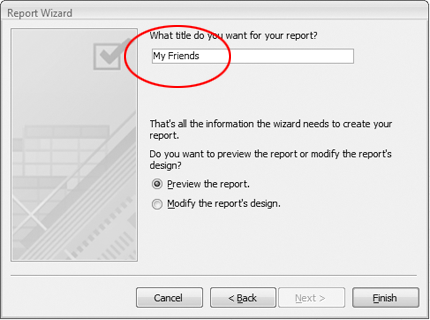
When the final screen appears, give a descriptive name for your report in the text box provided. Click on the Preview the report radio button and then click the Finish button to see your report.

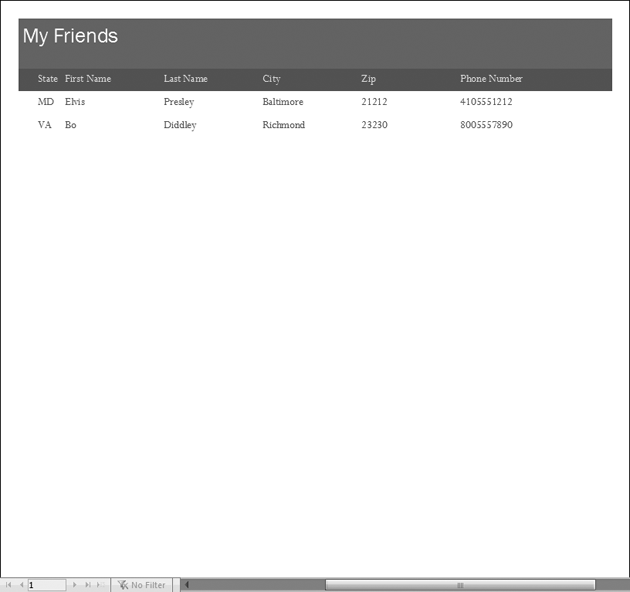
The report will be automatically created, saved and opened for you to view. It should look somewhat similar to this: